


 |
| My absolute favorite part of our house is our enclosed porch. It's an area where we can relax and eat meals while enjoying the beautiful country views. It's a fairly small room and the surrounding walls are white, so I wanted to create something that would bring a little color and rustic feel into the room. This DIY project was extremely simple to make and doesn't leave a big mess everywhere! |
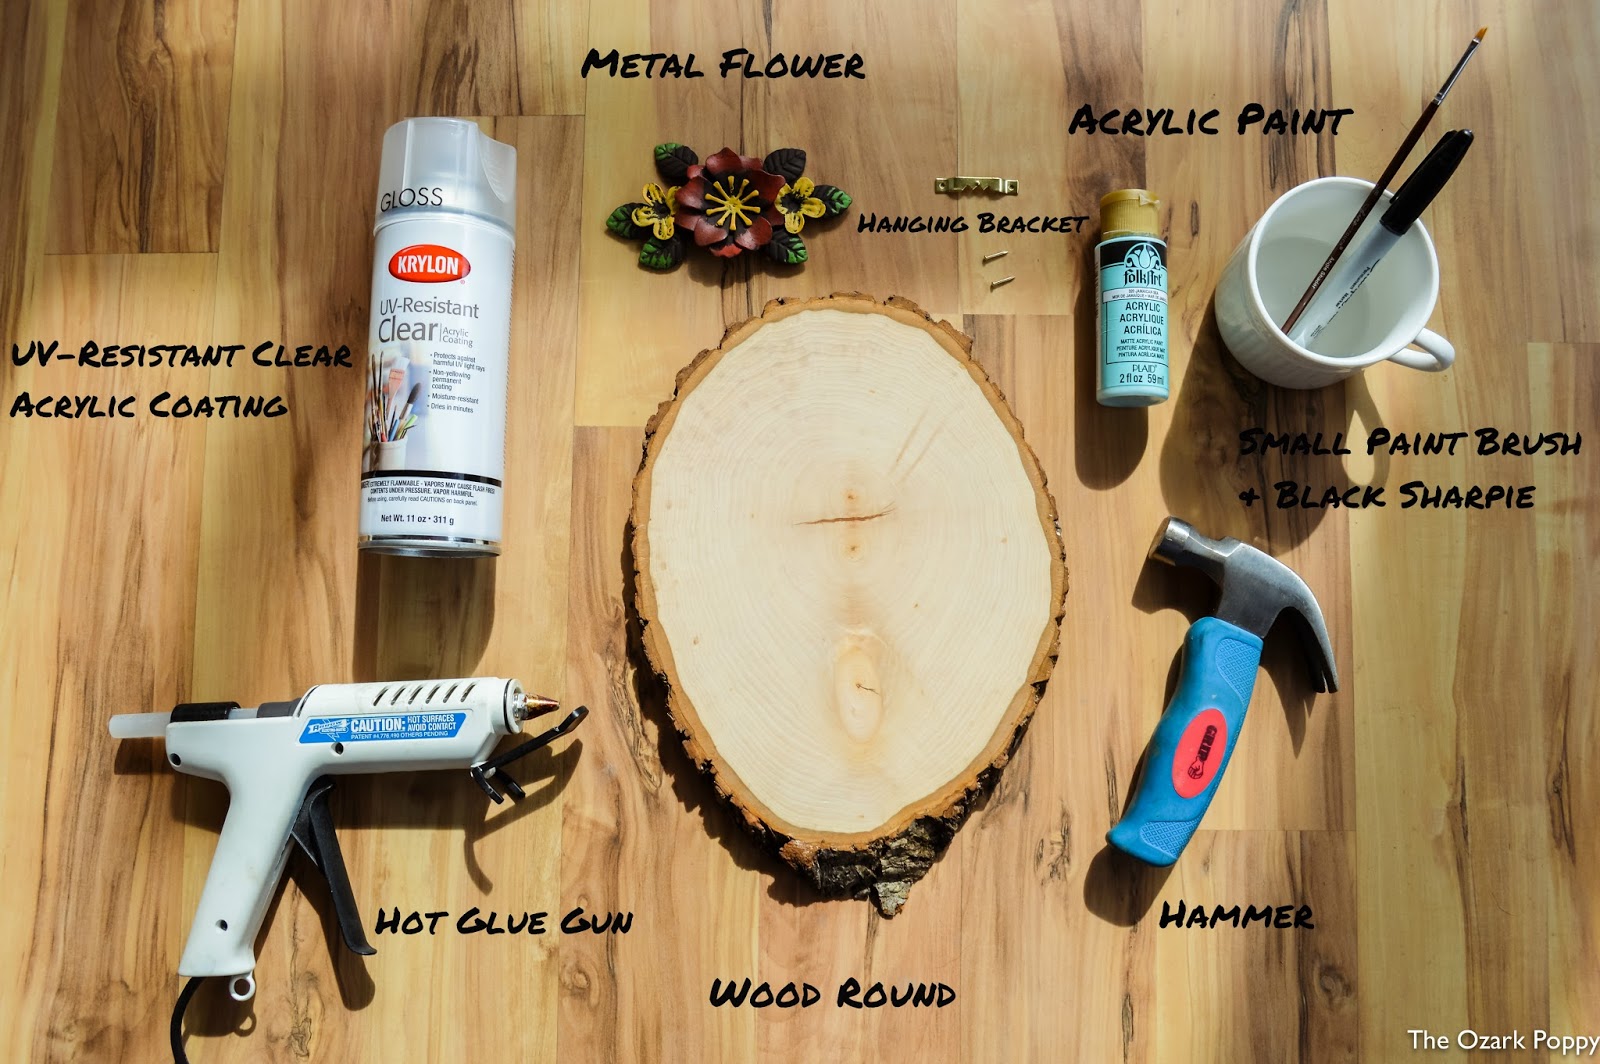 |
| Here are all of the tools I used to create this rustic wood round. In Arkansas, we have a craft supply store called "Hobby Lobby" that sells various sizes of wood rounds, which is where I got mine from. I'm sure most craft supply stores carry them though. The metal flower decoration was also purchased from Hobby Lobby, but you can use whatever decoration fancies your style :) I also purchased some UV-Resistant Clear Acrylic Coating spray and blue pastel colored acrylic paint. You will also need to make sure you have a small hanging bracket and small nails to go with it (you can usually find this in any picture hanging kit), a hammer, thin angle paintbrush, a black sharpie, and a hot glue gun. |
 |
| First, using my blue pastel acrylic paint and thin angle brush, I painted "farm life" in cursive. But of course you can paint your own saying or one of your favorite quotes... The ideas are endless! The thin angle brush was extremely easy to use for those really thin and detailed lines. I LOVE pastel colors and everything pastel, but of course you can use whatever colors appeal to you. I let the paint dry for about an hour or so, and then outlined my letters with the black sharpie. This helps with really making your colors and text pop! Next, I sprayed a thin layer of the UV-Resistant Clear Acrylic Coating spray over my painted text. It has a pretty strong smell, so make sure to use this spray in an open area with lots of ventilation! The spray will help with keeping your colors vibrate if your decor is located somewhere that sees a lot of sunlight. |
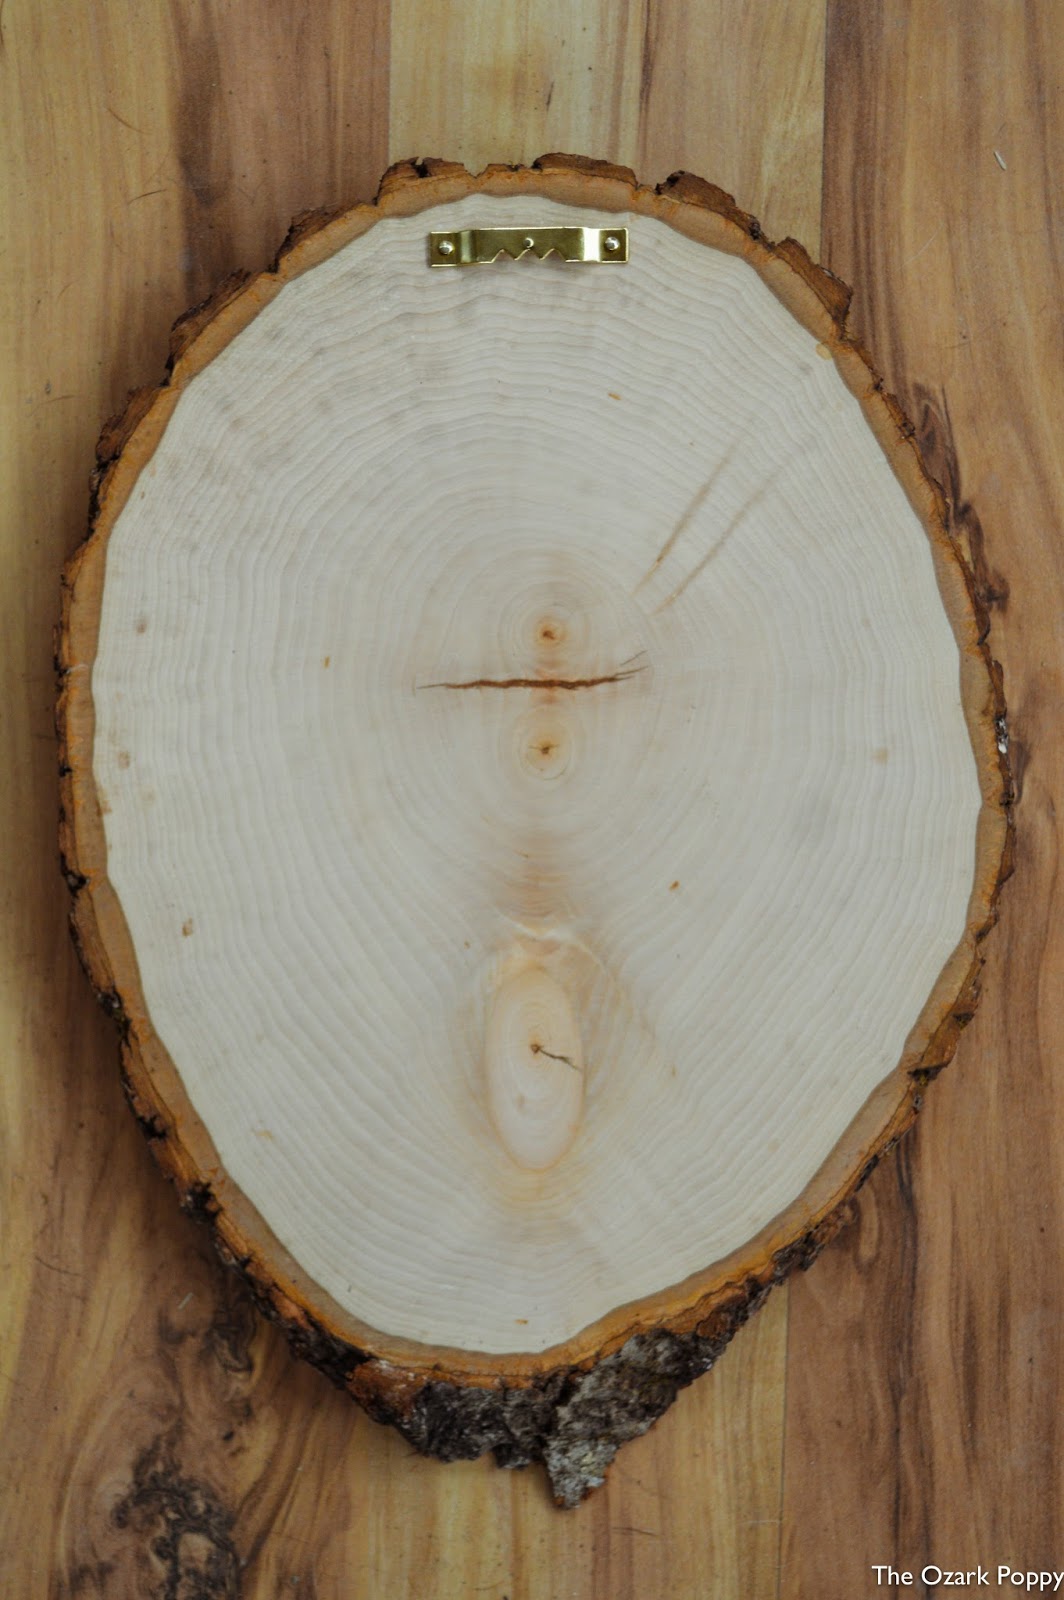 |
| My next step was applying the hanging bracket on the backside using a little hammer. Make sure to do this step BEFORE applying your metal decoration (flower), or else the bracket won't nail in correctly. Lastly, turn over your wood round and apply your metal decoration using a hot glue gun. And wa-la! You have yourself a cute new rustic home decor! Easy peasy, wasn't it? :) |
Quite an interesting article! Thanks for sharing it here. I am looking for interesting DIY birthday party decoration ideas. Have to host a party for my son’s 7th birthday and he wants this party at an outdoor venue Houston. Searching for some low budget decoration ideas.
ReplyDeleteThank you! I would definitely recommend incorporating rustic wood rounds to your son's birthday party! They make for awesome outdoorsy decor and are very low budget. Plus, the ideas are endless! You can always reuse them as well :) A very happy birthday to your son!
DeleteMy two most used and useful power tools are my small portable power saw and my portable power drill. I use these two pieces of equipment on each and every woodworking project.cordless screwdriver
ReplyDeleteI truly welcome this superb post that you have accommodated us. I guarantee this would be valuable for the vast majority of the general population. Hand Planer
ReplyDeletethanks admin good content Seokoloji
ReplyDeleteVezir Sosyal Medya
Alışveriş
HDE Bilişim
You made such an interesting piece to read, giving every subject enlightenment for us to gain knowledge. Thanks for sharing the such information with us to read this... Satta king fast
ReplyDeletemmorpg
ReplyDeleteİNSTAGRAM TAKİPÇİ SATİN AL
Tiktok jeton hilesi
Tiktok Jeton Hilesi
Antalya Sac Ekimi
referans kimliği nedir
instagram takipçi satın al
metin2 pvp serverlar
instagram takipçi satın al
SMM PANEL
ReplyDeletesmm panel
iş ilanları
instagram takipçi satın al
hirdavatciburada.com
beyazesyateknikservisi.com.tr
servis
jeton hilesi