 |
| A couple months ago, I came across a batch of old school recipes that my grandma Millie had written up. She was a fantastic cook - everyone loved her meals and desserts! And since I have yet to cook any of her recipes, I figured this weekend would be a good time to start. Since we will be pretty busy tending the garden this weekend, I wanted to make something that was quick and easy. This recipe for her Lemon Lush was just that! Extremely tasty and light, this dessert is perfect for spring time! Grandma Millie's Recipe:
Lemon Lush
(serves approx. 12)
Crust -
1 stick Oleo (margarine)
1 cup chopped pecans
1 cup self rising flour
First, melt the margarine and mix with pecans and flour. Then, press ingredients in 9 1/2 x 13 glass pan. Bake at 350 degrees for 25 minutes, or until golden. Then, let cool.
Topping -
18 oz. cream cheese
19 oz. whipped topping (Cool Whip)
1 cup sugar
1 can of lemon pie filling
Place cream cheese in mixing bowl, add sugar and beat well. Then, stir in whipped topping. After, layer 1/2 of the cream cheese mixture on crust and then layer 1/2 of the lemon pie filling on top of that. Repeat this step by layering the rest of the cream cheese mixture, and then topping it off with the remaining lemon pie filling.
* Refrigerate several hours before cutting. *
~ Enjoy! ~
|


Saturday, February 27, 2016
Grandma's Lemon Lush
Wednesday, February 24, 2016
DIY Rustic Wood Round
 |
| My absolute favorite part of our house is our enclosed porch. It's an area where we can relax and eat meals while enjoying the beautiful country views. It's a fairly small room and the surrounding walls are white, so I wanted to create something that would bring a little color and rustic feel into the room. This DIY project was extremely simple to make and doesn't leave a big mess everywhere! |
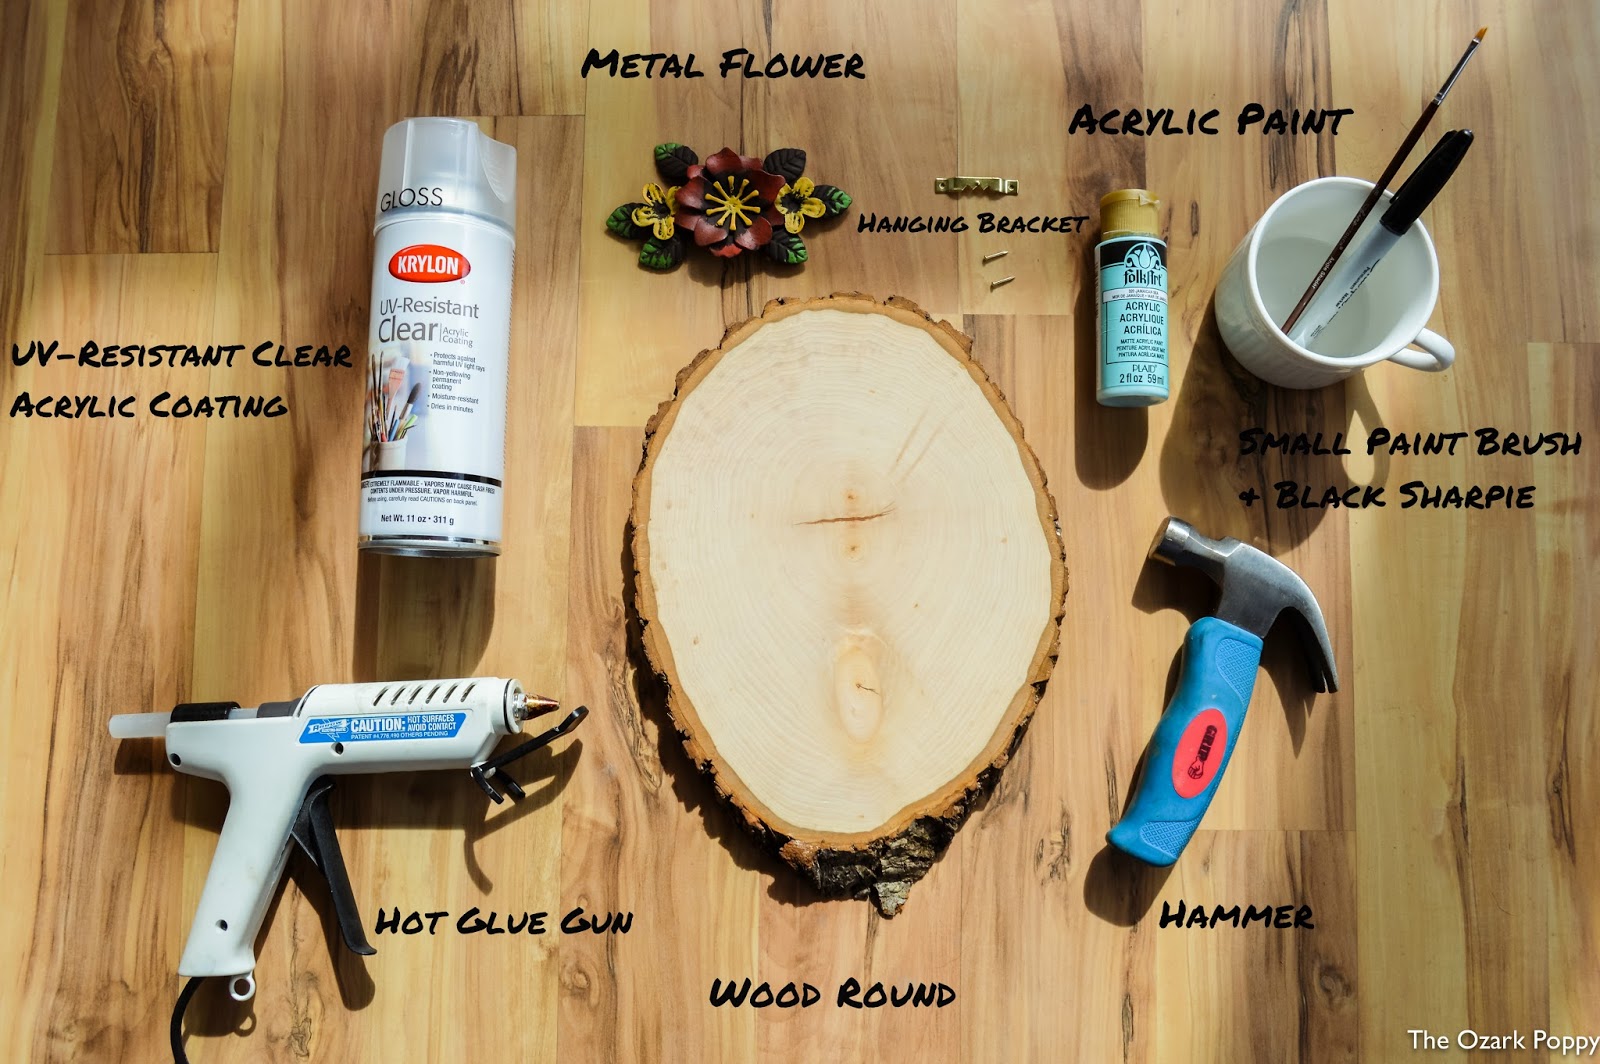 |
| Here are all of the tools I used to create this rustic wood round. In Arkansas, we have a craft supply store called "Hobby Lobby" that sells various sizes of wood rounds, which is where I got mine from. I'm sure most craft supply stores carry them though. The metal flower decoration was also purchased from Hobby Lobby, but you can use whatever decoration fancies your style :) I also purchased some UV-Resistant Clear Acrylic Coating spray and blue pastel colored acrylic paint. You will also need to make sure you have a small hanging bracket and small nails to go with it (you can usually find this in any picture hanging kit), a hammer, thin angle paintbrush, a black sharpie, and a hot glue gun. |
 |
| First, using my blue pastel acrylic paint and thin angle brush, I painted "farm life" in cursive. But of course you can paint your own saying or one of your favorite quotes... The ideas are endless! The thin angle brush was extremely easy to use for those really thin and detailed lines. I LOVE pastel colors and everything pastel, but of course you can use whatever colors appeal to you. I let the paint dry for about an hour or so, and then outlined my letters with the black sharpie. This helps with really making your colors and text pop! Next, I sprayed a thin layer of the UV-Resistant Clear Acrylic Coating spray over my painted text. It has a pretty strong smell, so make sure to use this spray in an open area with lots of ventilation! The spray will help with keeping your colors vibrate if your decor is located somewhere that sees a lot of sunlight. |
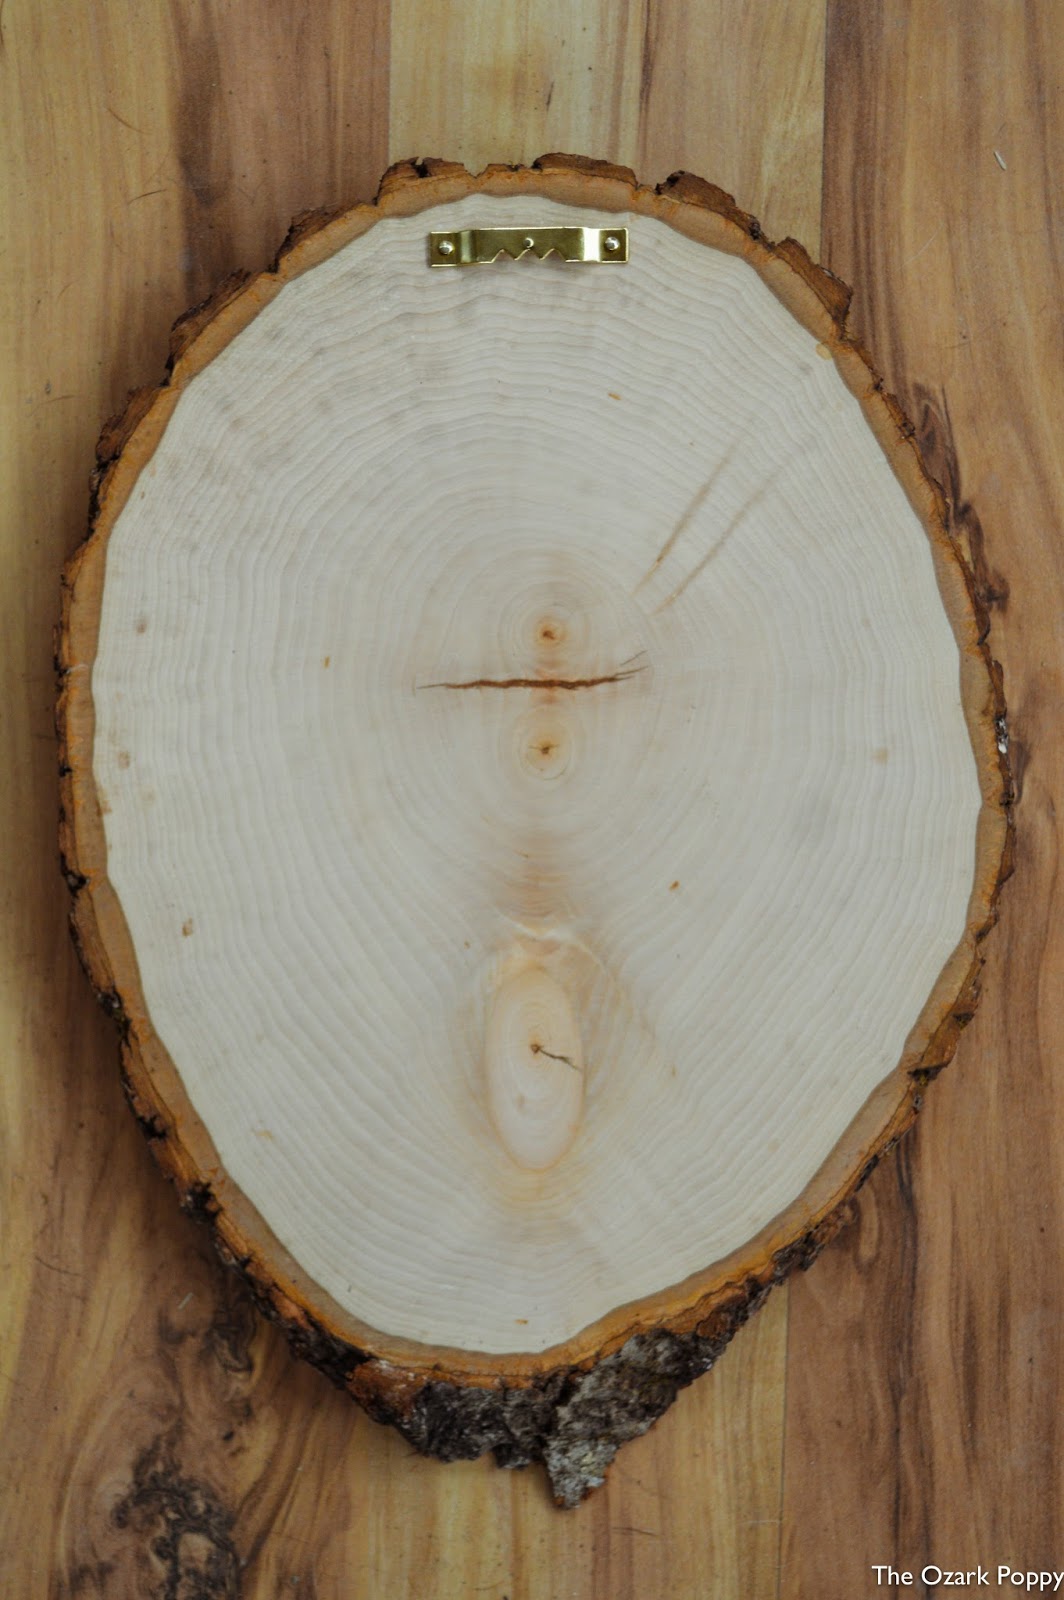 |
| My next step was applying the hanging bracket on the backside using a little hammer. Make sure to do this step BEFORE applying your metal decoration (flower), or else the bracket won't nail in correctly. Lastly, turn over your wood round and apply your metal decoration using a hot glue gun. And wa-la! You have yourself a cute new rustic home decor! Easy peasy, wasn't it? :) |
Sunday, February 21, 2016
Weekend Garden Prep
 |
| Our weekend consisted of hard work and digging in the dirt, but we made some great progress prepping our spring garden! With the help of Levi's dad, we were able to get a lot done. First, we determined where we wanted our garden to be located. We wanted it to be in a good draining location, but not too far from our house. Once we figured that out, we hooked the plow up to the tractor and got to work. After we got the soil plowed, we cleaned up all the rocks and grass clumps from the surface (talk about a workout... those grass clumps are heavier than you'd think!) Then, we switched the plow out for the garden harrow and started raking the soil free of debris. |
 |
| While working the soil, we found a jaw bone from what looks to be from a cow. A little creepy if you ask me.... |
 |
| The soil is now ready for the tiller! Which is what we'll tackle next weekend. |
 |
| Since we're planning to build raised garden beds next weekend, we decided to go ahead and get the materials now. Instead of spending money on lumber, we went down the road to a neighbor's old barn and re-purposed as much wood as possible. The old barn collapsed many years ago and our neighbor has kindly let us pull out as much lumber as we wanted. I guess it ends up helping both of us out! |
 |
| While we were collecting lumber, our beagle "Milo" decided to drop by and see what we were up to. Once we got what we needed, we packed up our trailer of wood and Milo caught a ride home with us :) Be sure to stop by next weekend, as we plan to till the garden and build our raised beds using reclaimed barn wood. |
Friday, February 19, 2016
Repurposing Your Antique Ladder
 |
| When you live on a farm, you're bound to come across all sorts of old stuff laying around. Some may see it as junk, but we see it as potential furniture to give our home that country rustic feel. We have a couple old ladders that have been collecting dust in the shop building, so we figured we might as well put one of them to good use. There's so many neat ideas out there to incorporate old ladders in your home decor, but we decided to keep it simple and use this one as a small bookshelf. It's the perfect size to hold just enough books for light afternoon reading. It also makes the perfect piece for the awkward space between our couch and front door. I absolutely love our new bookshelf and it just goes to show that what you might see as old junk, can also be transformed into a new household treasure. What are some of the old items you've repurposed? I'd love to hear your ideas! |
Tuesday, February 16, 2016
Sowing Seeds Indoors
 |
I'm a total newbie when it comes to sowing seeds indoors, but it's been so fun watching the process of our seeds come to life - right in our kitchen! Since it's still too early in the year to be planting outdoors, we decided to follow the old Farmer's Almanac to determine which seeds we could start indoors. 
Our little seedlings need LOTS of light, so Levi set up this shelving unit (in our dining room) with lights to imitate the sun. Since the sun gives off both warm and cool light, we added a 3,000k and 5,000k bulb to each fixture. With proper light, water and temperature, the lettuce sprouted within two days! Shortly after, the cabbage and onion started to sprout as well. Since the peat pellets don't have many nutrients, we are using an organic liquid fertilizer to make sure our babies grow strong :) This weekend we plan on prepping our garden area for transplanting in March... I'll be filling you guys in with the progress next week!
|
Monday, February 15, 2016
Grandpa's Trusty Old Tractor
 |
| Growing up in Southern California, of course the only things I really knew were the beach, traffic on the 405, and weekend adventures to Disneyland. But throughout my childhood, my most favorable moments were always the family trips to Arkansas to visit my grandpa. I couldn't wait to see grandpa. He was the hardest working man I'd ever known and someone I wholeheartedly looked up to. Watching him feed the cows and work the land was always such a treasured experience for me. By the time I reached my senior year in high school, I realized that Los Angeles wasn't for me. I constantly found myself listening to The Dixie Chicks and daydreaming about what it would be like to live in the country. I didn't exactly know why I wanted to leave California, I just knew something better was waiting for me elsewhere. Years later, I finally made the decision to stop daydreaming about the country and to make living there a reality. And so in the Fall of 2012, I made the move. I started off living with my grandpa. He taught me how to operate the tractor, I taught him how to operate his iPad. He made me watch old westerns, I made him watch Say Yes To The Dress. We were the best of buds. Soon after, I met my now-fiancé Levi (pictured above). It didn't take long for Levi to learn that my grandpa was one of the coolest old guys around, so coming out to the farm became one of Levi's favorite weekend activities. The three of us had a great couple of years together, until my grandpa was suddenly diagnosed with esophageal cancer. The news hit us hard. Nothing quite prepares you for the moment you learn that your loved one has cancer. My grandpa opted out of doing chemo and radiation, and decided to just do surgery instead. The surgery seemed successful and the doctors were confident that they had gotten the entire tumor. But about a year later, the cancer had come back. This time in full force. Once my grandpa became too weak to do everyday life, Levi and I took charge and did what we could to make him comfortable at home and take care of the land. Once his passing came, I knew I had to be strong and that everything was about to change. While my time in Arkansas hasn't gone as planned, I know with every part of me that the universe put me here for a reason. I came here to spend the last couple of years with my grandpa that he had left on this earth, I just didn't know it at the time. I came here to takeover this farm and have the opportunity to turn it into something great. Something that would make my grandpa proud. And I came here because if I hadn't made the move, I wouldn't have met my fiancé. My experience in Arkansas has taught me a lot of things, but it has constantly reminded me that life is a series of everything happens for a reason moments, and that with grandpa's trusty old tractor, anything is possible. |
Subscribe to:
Comments (Atom)